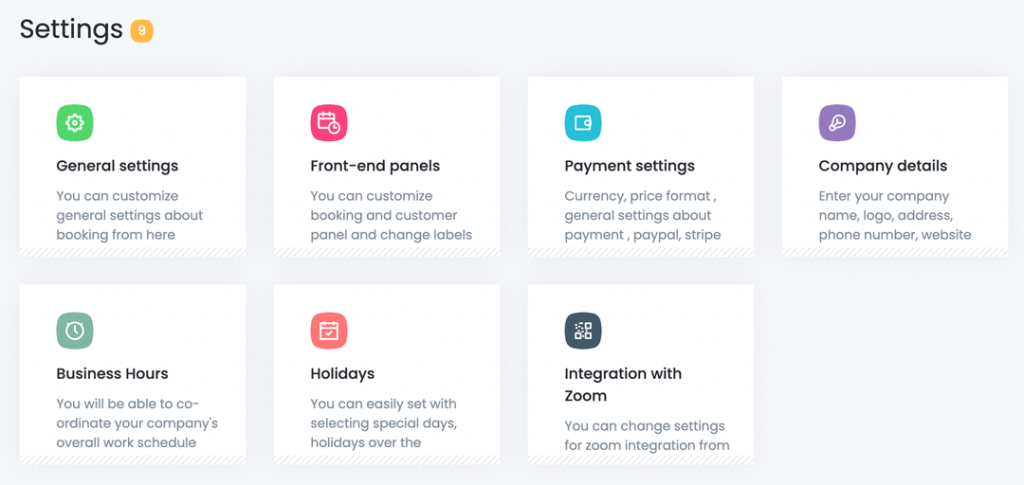
Click “Settings” on the left side of the BookOm dashboard, and then click “General Settings”.
The General Settings has 11 sections:
- Time slot length
- Set Slot Length As Service Duration
- Minimum Time Requirement Prior To Booking
- Limited Booking Days
- Week Starts On
- Default Appointment Status
- Google Maps API Key
- Activate Google ReCAPTCHA
- Date Format
- Time Format
- Show Time Slots In Client Time-Zone

General Settings Sections
1. Time Slot Length
Within “General Settings” you can set the default length of your appointment time slots.
For example, imagine you chose a time slot length of 30 minutes. This means that when customers make a new booking, they will see times up to 30 minutes (e.g. 10:30 am, 11:00 am, 11:30 am, 12:00 pm, 12:30 pm).
The default value is 5 minutes.
2. Set Slot Length As Service Duration
If you activate this option, the time slot length option will be overridden. The slot length will be equal to the duration of the service. For example, if the duration of the service is 1 hour when customers make a booking, they will see times at 1-hour intervals: 10:00 am, 11:00 am, 12:00 pm, 13:00 pm, etc).
3. Minimum Time Requirement Prior To Booking
With this option, you can set how many days in advance a customer can make the booking. For example, if you want customers to book a minimum of one day before the appointment, you would select one day. If this option is not needed, disable it.
4. Limited Booking Days
With this option, you can choose how far into the future the customer can make the booking. For example, if you type in 90 days, your customers won’t be able to add bookings 90 days from the day they are booking the appointment.
5. Week Starts On
With this option, you can choose which day of the week to start on. The default is “Sunday”.
6. Default Appointment Status
When a customer adds a new booking, you can show what the default value will be. If you need staff members to confirm the appointment (if you have BookOm Studio), you can select “pending” status. The staff will be automatically notified by email, and can then log into BookOm to approve or reject the appointment. The default value is set to “approved”.
7. Google Maps API Key
If you want to display Google Maps of your locations, you’ll need to enter your Google Maps API Key here.
8. Activate Google ReCAPTCHA
reCAPTCHA is a free service from Google that helps protect websites from spam and abuse. A “CAPTCHA” is a test to tell humans and bots apart.
9. Date Format
If you want to change the date format, choose one from the dropdown. The default date format is “Y-M-D”.
10. Time Format
If you want to change the time format, choose one from the dropdown. The default date format is “24 hours”.
11. Show Time Slots In Client Time-Zone
The “show time slots in client time-zone” is useful if you have appointments worldwide (e.g. if giving Zoom yoga classes). Switch the toggle to the right if you want this setting activated.
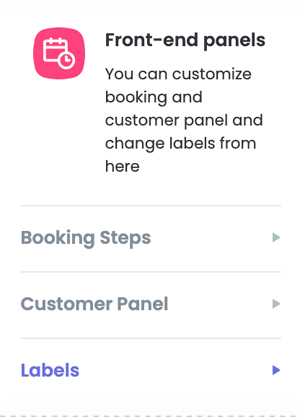
- Booking Steps
- Customer Panel
- Labels

Front-end Panel Settings: Booking Steps
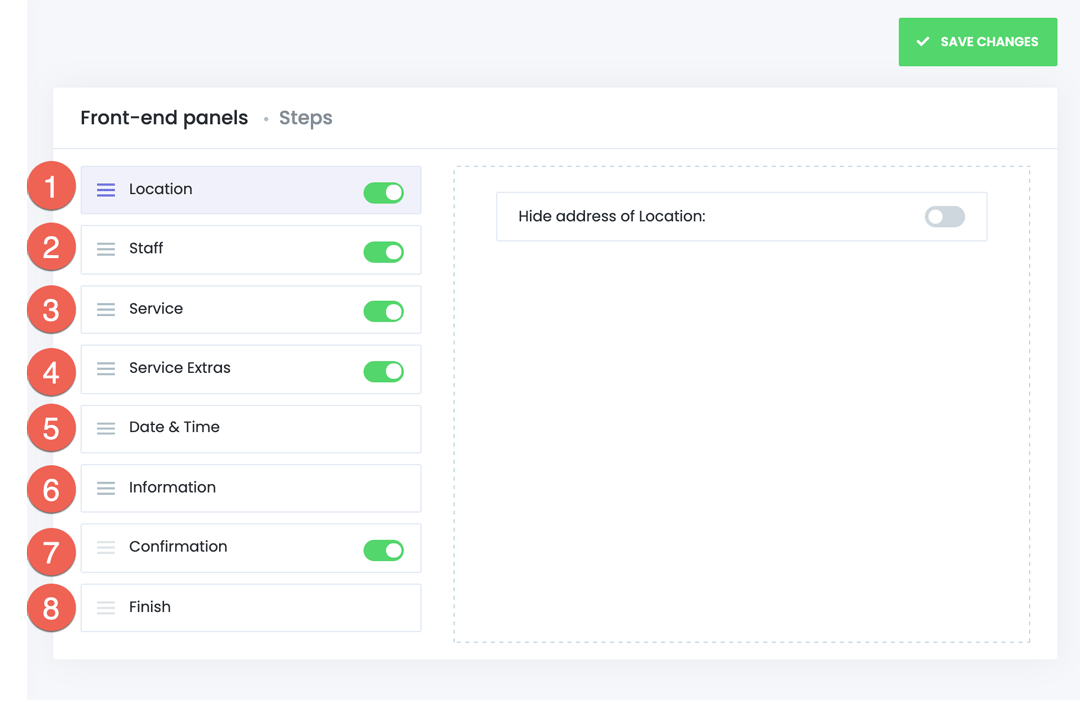
Click “Settings” on the left side of the BookOm dashboard, then click “Front-end Panels”, and select “Booking Steps”. There are 8 sections that you can edit (see screenshot above).
The 8 sections within the “Booking Steps” are:
- Location
- Staff
- Service
- Service Extras
- Date & Time
- Information
- Confirmation
- Finish
1. Location

When you select “Location” you will be able to toggle the “Hide address of Location” to the right if you want to hide the location.
2. Staff
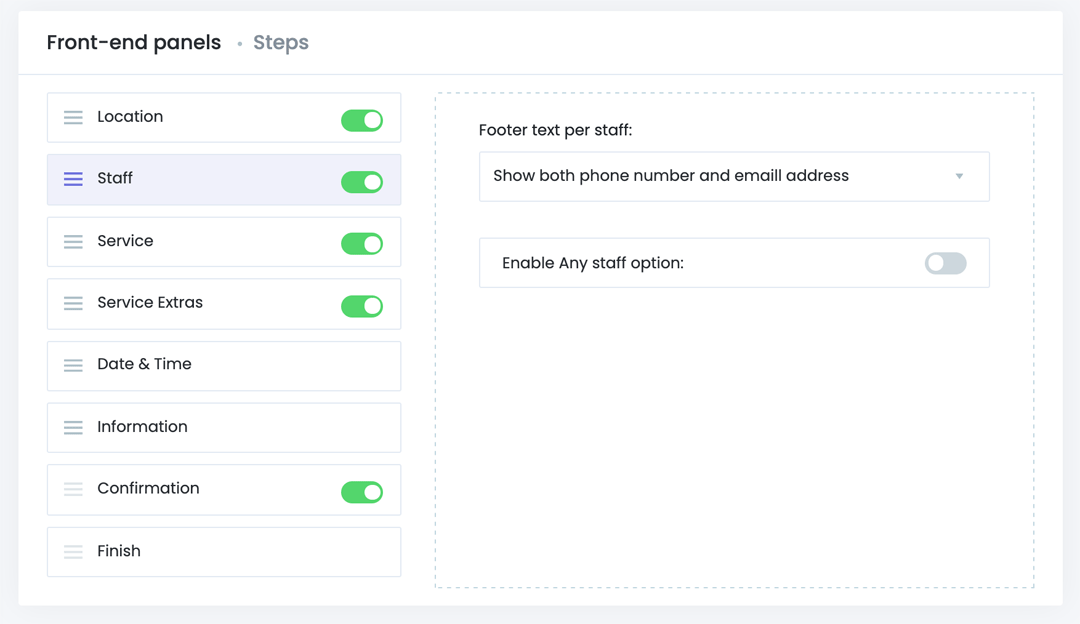
Within the “Footer text per staff” dropdown you can choose from:
- Show both phone number and email address
- Show only Staff email address
- Show only Staff phone number
- Don’t show both phone number and email address
If you toggle “Enable Any staff option” to the right, you can select from 8 options (see screenshot below).

3. Service

If you don’t want your services to show up within your bookings, you can deactivate them by toggling “service” to the left.
4. Services Extra

You can add “extras” to all your services (e.g. give customers the option to purchase a yoga mat if you have a yoga class service). If your service doesn’t have any extras, you will probably want the customer to skip this step during checkout, so keep this set to default (toggled on).
5. Date & Time
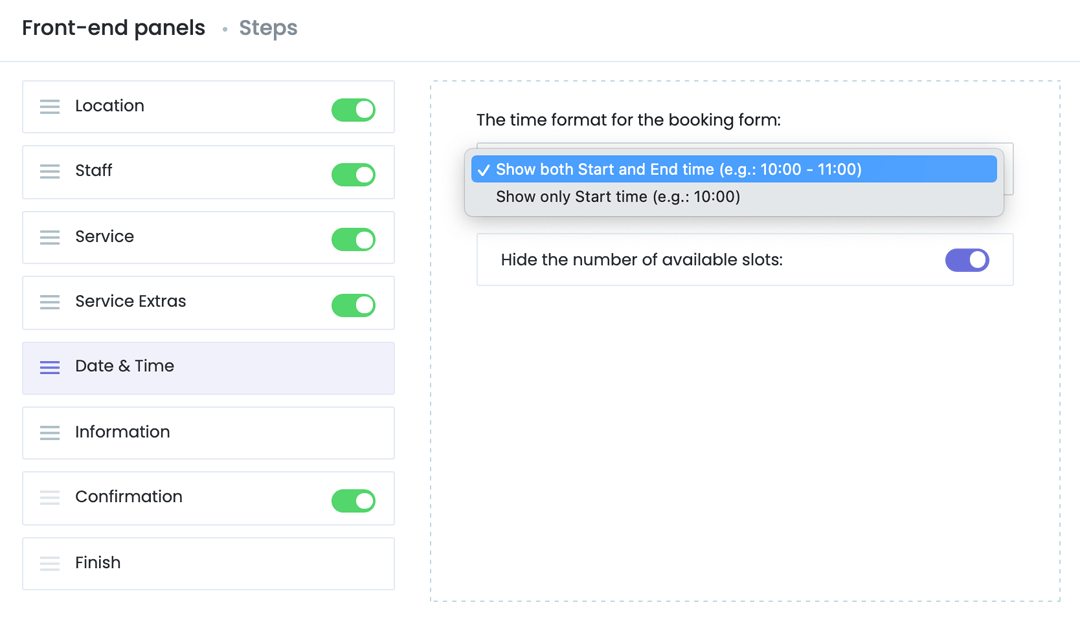
Within the “The time format for the booking form”, you have two options from the dropdown:
- Show both Start and End time
- Show only Start time
If you want to hide the number of available slots, slide the toggle switch to the left (the default is on).
6. Information
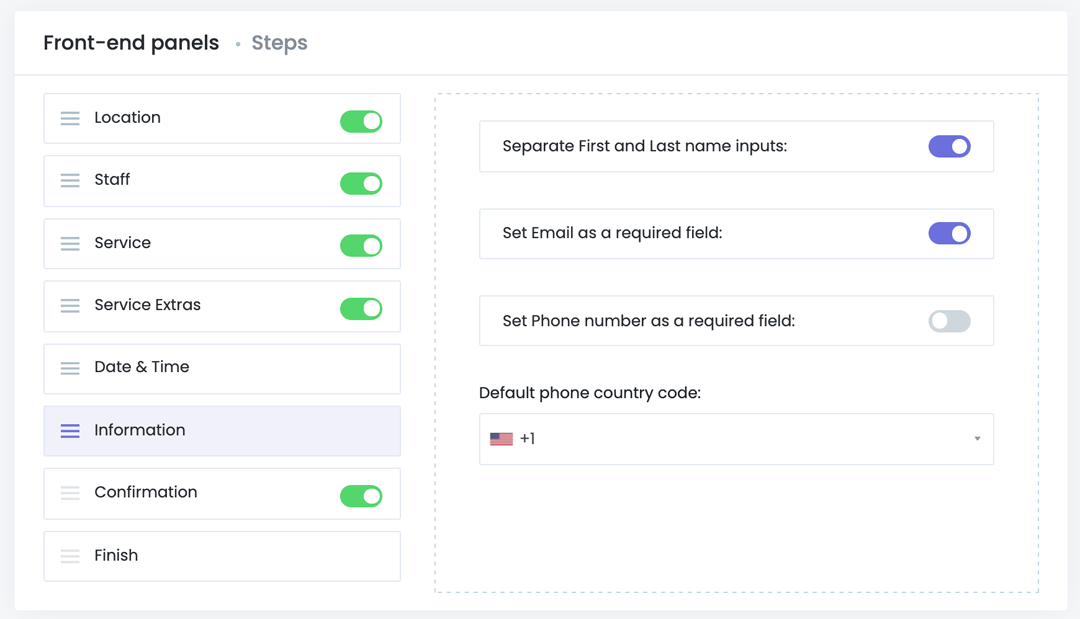
The “Separate First and Last name inputs”, and “Set Email as a required field” are both set to on as default.
The “Set Phone number as a required field” is set to off as default.
If you toggle the “Set Phone number as a required field” to on, within the “Default phone country code” section you’ll need to select your country code.
7. Confirmation
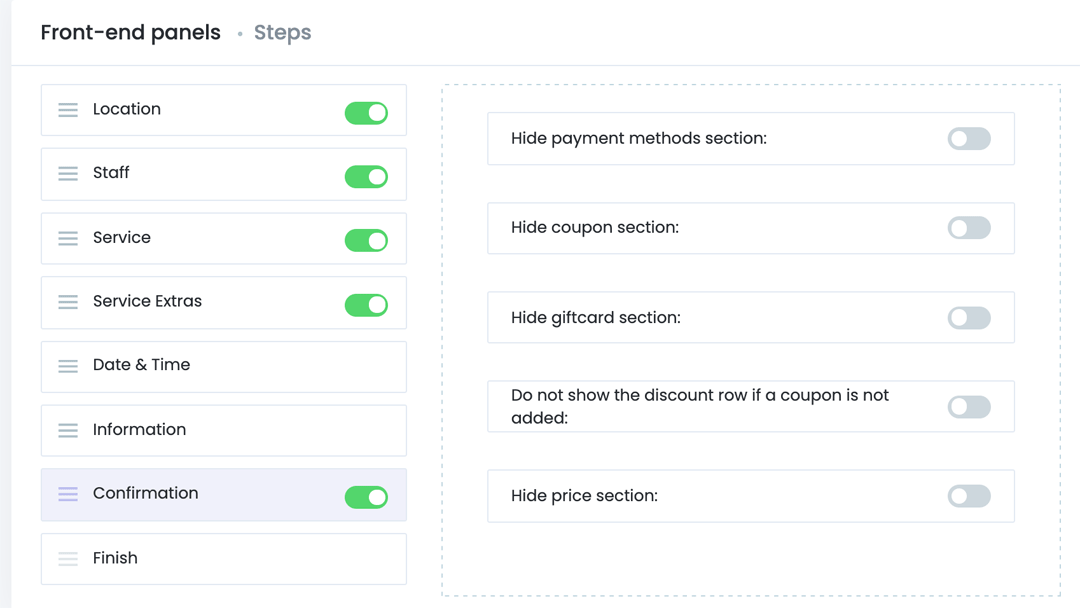
You have the option of hiding the following from the booking:
- Hide payment method section
- Hide coupon section
- Hide giftcad section
- Hid price section
8. Finish

Within URL of FINISH BOOKING button” you can add a URL to where you want the person who made the booking to be redirected to when they complete the booking (e.g. your online shop, or blog).
You’ll also be able to hide:
- Hide the ADD TO GOOGLE CALENDAR button
- Hide the START NEW BOOKING button
- Hide a confirmation numer
The starting confirmation number will be “223”.
Front-end Panel Settings: Customer Panel

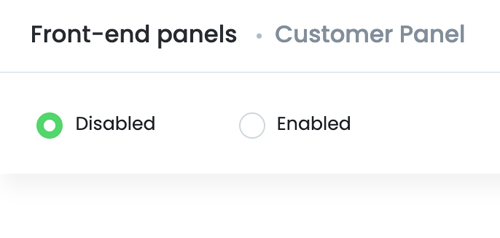
If you’d like your customers to have a “Customer Panel” where they can log into and access their booking information, set this “enabled”.
Front-end Panel Settings: Labels
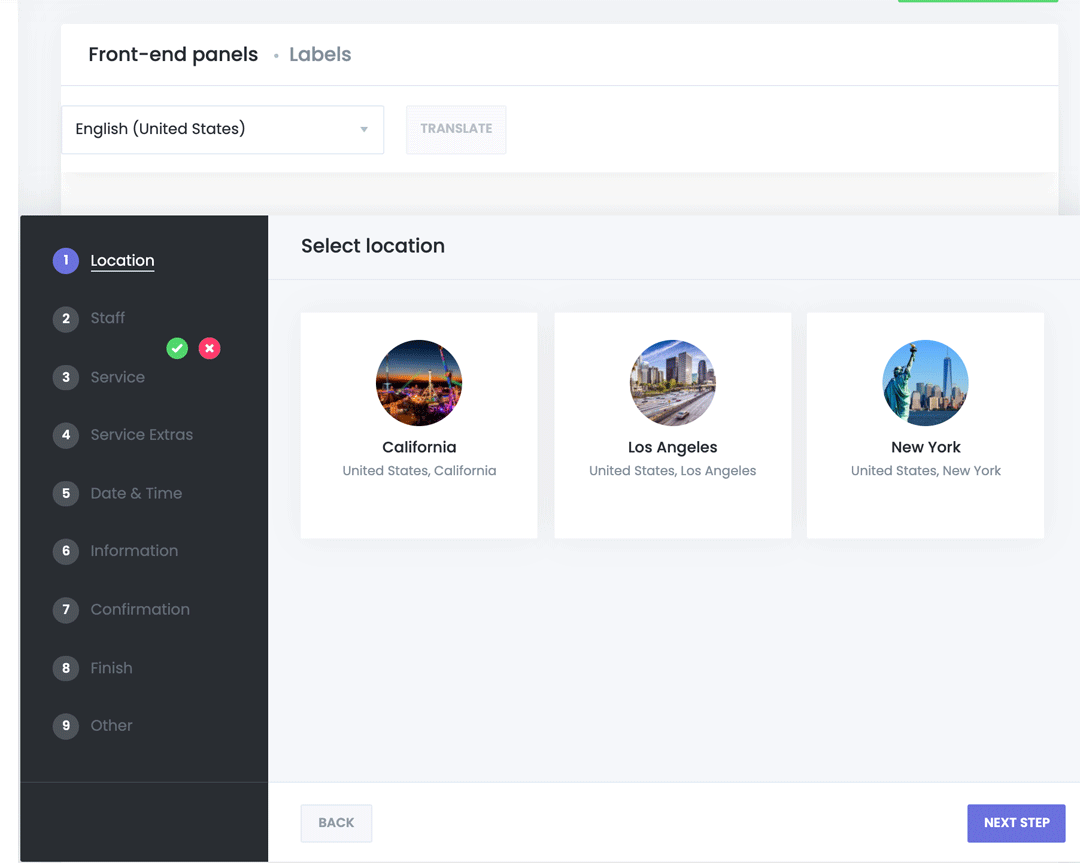
There are 9 sections to the booking system. You can change the label of all 9 sections (e.g. if you click on “Location” you can change the name to “Venue”).
- General
- Payment methods
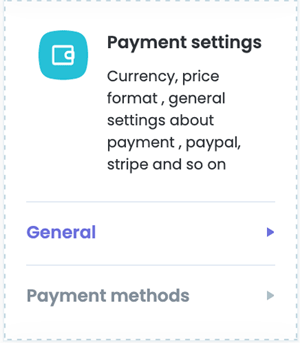
Payment Settings: General

The General section has 6 parts:
- Currency
- Currency symbol
- Currency format
- Price number format
- Price number of decimals
- Customer can pay full amount
1. Currency: Choose the currency used by your business. The default value is USD ($).
2. Currency symbol: Change the currency symbol (e.g. from $ to £).
3. Currency format: Change where the currency symbol goes.
There are 4 types of currency formats:
- $100 (default)
- $ 100
- 100$
- 100 $
4. Price number format: Choose the format of the price number.
There are 4 types of formats:
- 45 000.00 (default)
- 45,000.00
- 45 000,00
- 45.000,00
5. Price number of decimals: specify how much the price will be rounded after the comma. The default value is 100.00 ( 2 decimals).
6. Customer can pay full amount: If you don’t want customers to pay the full amount upfront, toggle this option to the “off” position.
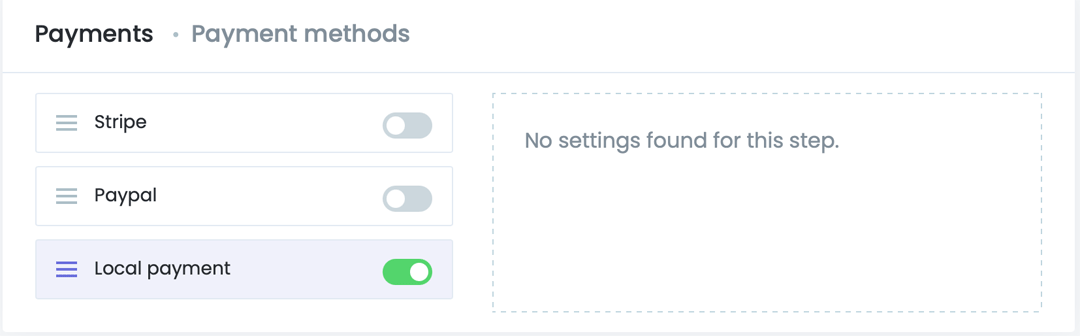
Payment Settings: Payment Methods
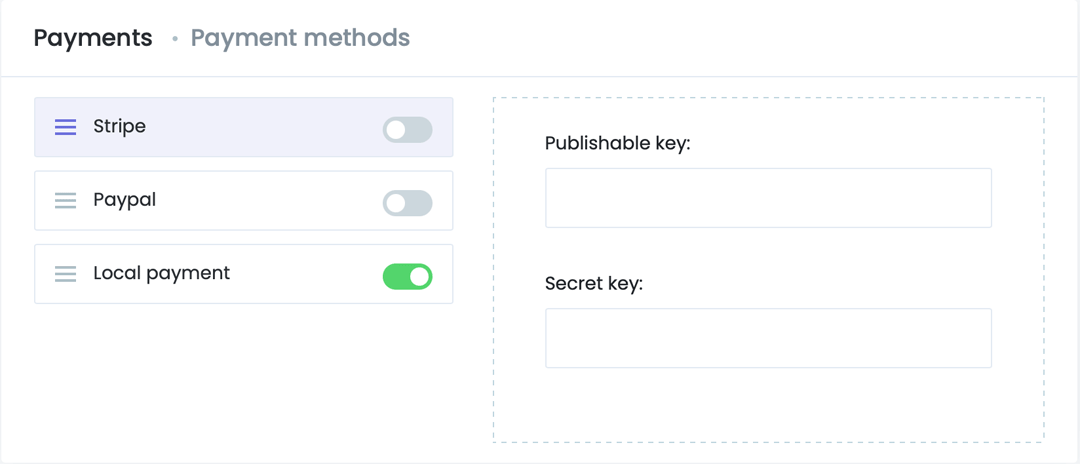
The Payment Methods section has 3 parts:
- Stripe
- Paypal
- Local Payment
1. Stripe: If you want to accept bookings via Stripe, click on the Stripe box (see screenshot below), and enter the publishable key and secret key. If you’re not sure how to get those two keys Google “how to get Stripe publishable key and secret key” and you’ll find lots of articles and YouTube videos showing how.
 2. Paypal: If you want to accept bookings via Paypal, click on the Paypal box (see screenshot below), and enter the client ID and Client Secret. If you’re not sure how to get those two keys Google “how to get Paypal Client ID and Client Secret” and you’ll find lots of articles and YouTube videos showing how. To go live you’ll need to change the “mode” from sandbox to live.
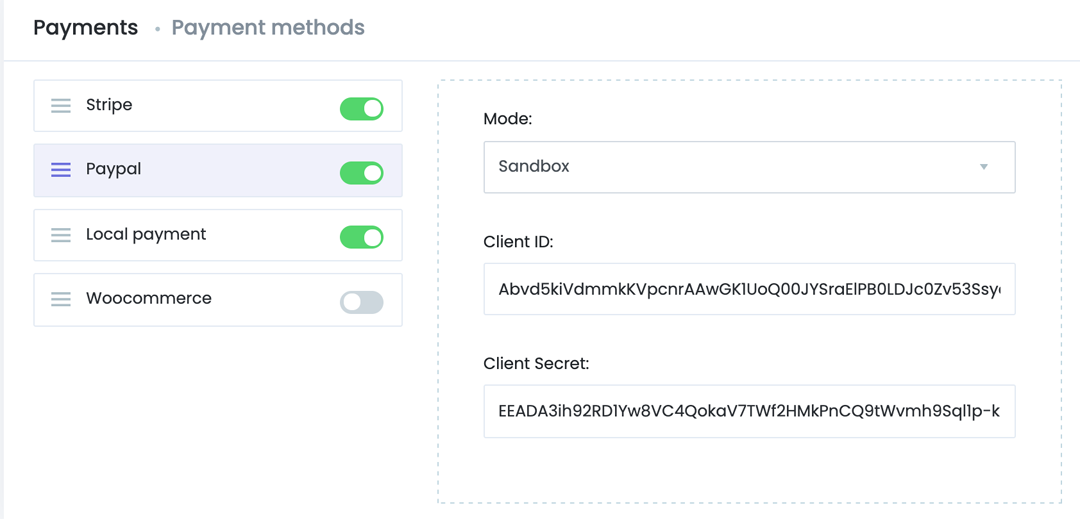
3. Local Payment: If you don’t want customers to pay you in person (e.g. at your class if you’re a yoga teacher), then toggle the Local Payment switch to off.

The Company Details section has 6 parts:
- Logo upload
- Company name
- Address
- Phone
- Website
- Toggle to display a company logo on the Booking panel
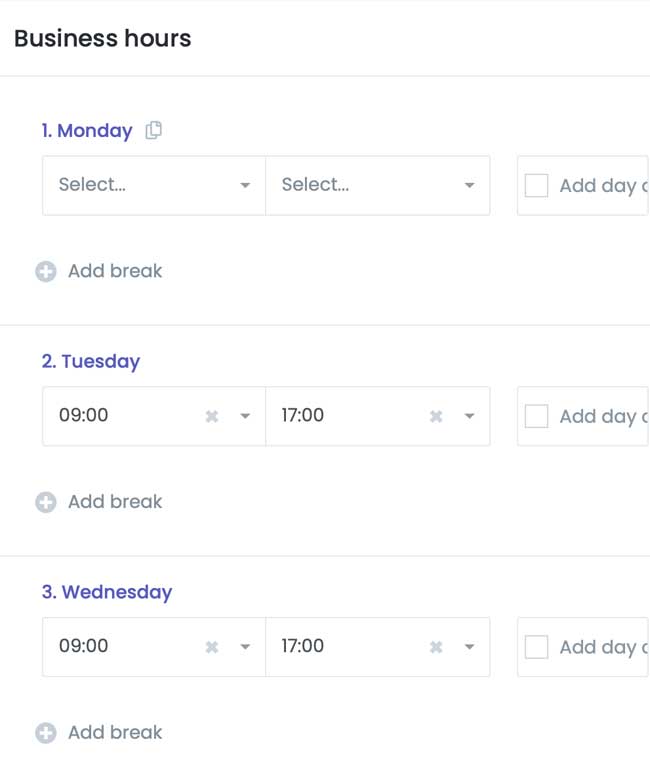
You can select a start and end time for each day (e.g. 9 am to 5 pm).
Tick the “Add day off” checkbox if that is your day and don’t want to take any appointments on that day.
Click the ” + Add break” icon to add breaks (e.g. 12:00 to 1:00pm for lunch).

Copy the API key from your Zoom account and paste here.
Copy the API secret from your Zoom account and paste here.
Enter the meeting topic (title of your Zoom meeting).
Enter a description of your Zoom meeting.