In this post, you’ll learn how to quickly and easily get setup on BookOm.

BookOm SignUp Steps

Getting setup on BookOm is 100% free. You can have a play with all the features and see if we’re the right fit for you and your business. 

Step 1: Sign Up For Free

Go to our Sign Up page. Enter your name and email address (no credit card is required). 

Step 2: Check Your InBox 

We need to verify your email. Check your email for a confirmation link.

Step 3: Click The Complete Registration Link

Click the “Complete Registration!” link within the registration email.  

Step 4: Create Your Business URL Address

You’ll be able to send your business URL to prospects and clients so they can book into your services (if you have a website, you’ll also be able to paste your booking form HTML code onto any page of your site).

BookOm signup Step 4


Step 5: Enter Your Company Details

Enter your company name, business address, business phone number, and website URL. You can also add an image (e.g. an image of yourself, your venue, or logo).  Then click the “Complete Registration” button (see screenshot below). 

BookOm signup step 5

Step 6: Head Over To Your Dashboard

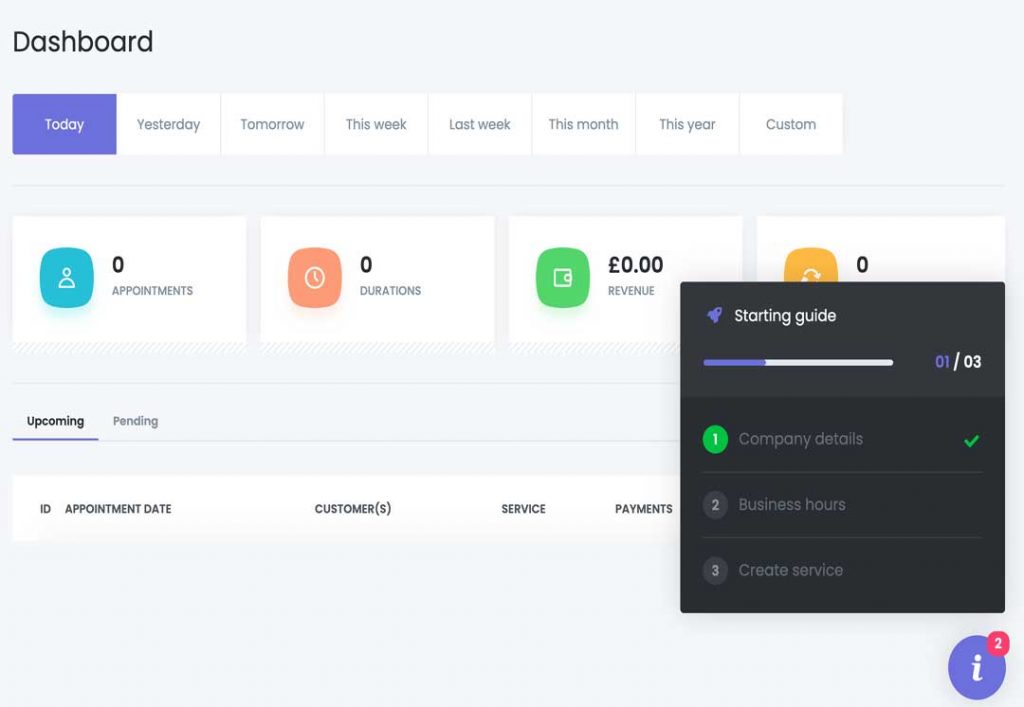
Congratulations! You’ve just completed the sign up for your free BookOm account. Click the “Go To Dashboard” button (see screenshot below). 

BookOm signup step 6

BookOm SignUp Steps

You’ve already filled out your “company details” when registering. So, there are only two more steps to get set up. 

Step 1: Enter Your Business Hours

This is where you’ll select your business hours for your “appointments”. If you don’t have appointments (e.g. you’re a yoga teacher and your only service is teaching classes, you don’t to fill this out).

Starting Guide Step 1: Business Hours

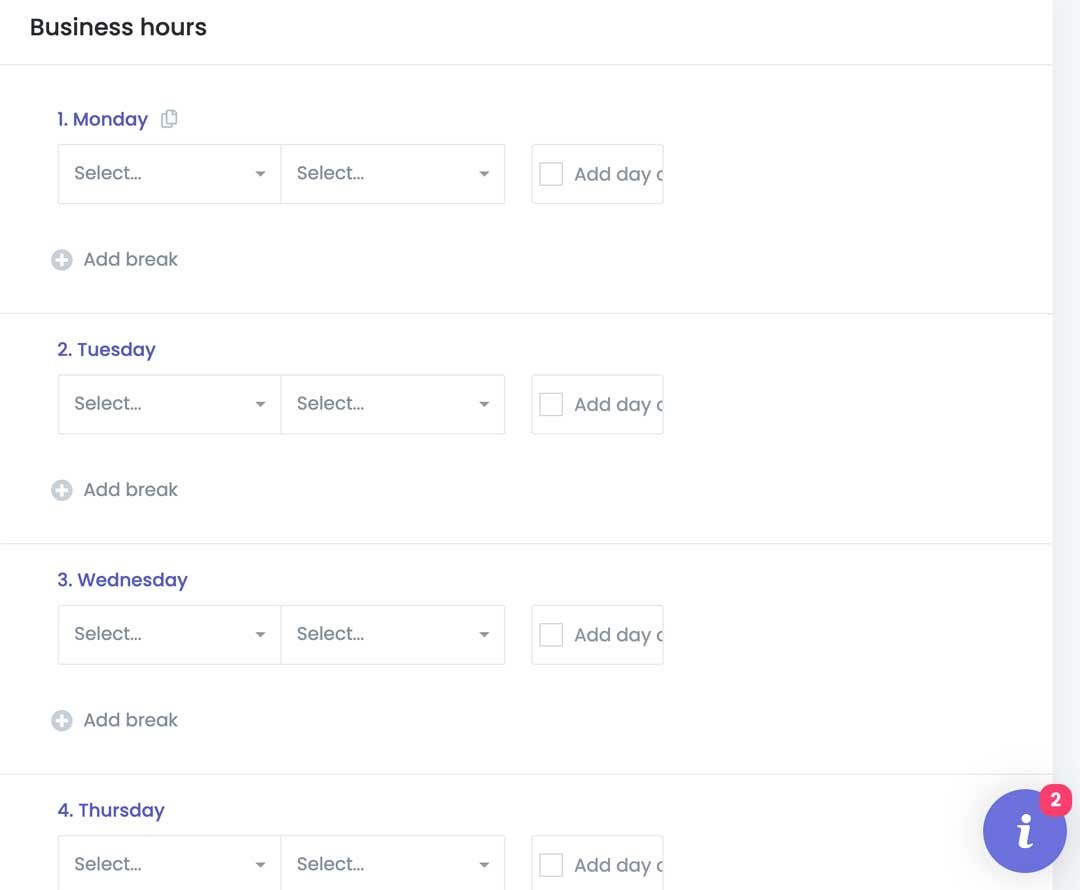
Times: Select the time your business starts and ends each day. 

Add Day Off: Tick the “add day off” box if you don’t want to book any appointments on that day (e.g. Saturday and Sunday may be your days off). 

Add Break: Click the  Add break” icon to add breaks for the day (e.g. from 12:00 to 1:00 pm for lunch). 

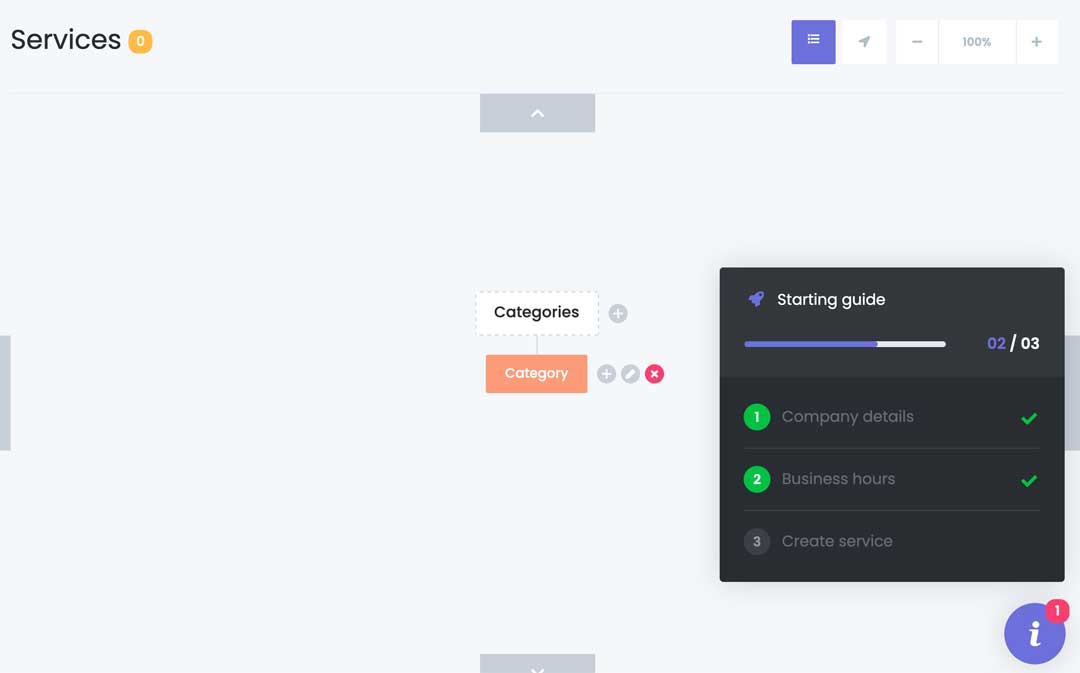
Step 2: Create Services

This is where you’ll create your services. You can find out more about creating services here

BookOm Starting Guide Services Setup

Let out a little whoop of joy, because you’re a step closer to putting the booking form on your website (or share the booking form link in emails, Facebook, etc).

You can think of BookOm as a full-time member of your staff who has taken over most of your admin work. The moment you add the booking form to your website, BookOm goes to work 24/7 booking people onto your services.

But It doesn’t stop there! 

BookOm is obsessed with growing your business.

When someone books onto a service (e.g. your Tuesday morning online Hatha yoga class), BookOm automatically sends them the details of the class, sends a reminder, and deposits the money directly into your Stripe account. You’ll wonder how you ever lived without BookOm by your side.

Recommended Posts