In this post, you’ll learn how to quickly and easily enable the Customer Panel in BookOm.
By The Time You Get To The End Of This Post You'll Know How To Quickly And Easily Enable The Customer Panel In BookOm
Within the “Notifications” section of BookOm, you will be able to enable the Customer Panel. The Customer Panel is a place where customers log in to view bookings and book onto more of your services.
The Steps
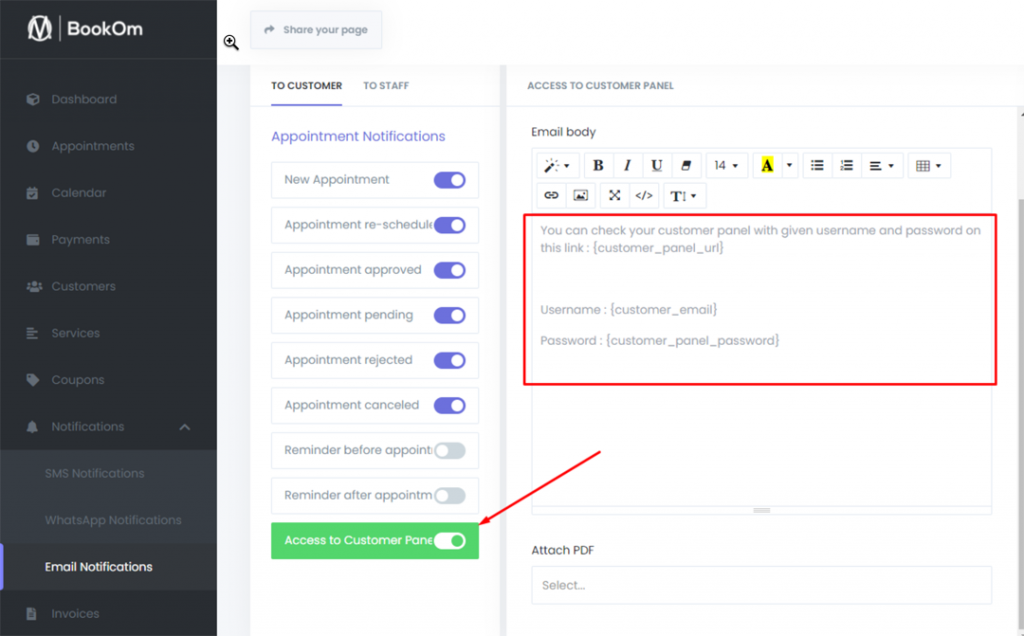
Click “Notifications” on the left side of the BookOm dashboard. Select “Email Notifications”, and toggle the “Access to Customer Panel” switch to on. When you’ve done that, customers will automatically be sent an email with their panel URL and username/password to log in and see their appointments list.
Let out a little whoop of joy, because you’re a step closer to putting the booking form on your website (or share the booking form link in emails, Facebook, etc).
You can think of BookOm as a full-time member of your staff who has taken over most of your admin work. The moment you add the booking form to your website, BookOm goes to work 24/7 booking people onto your services.
But It doesn’t stop there!
BookOm is obsessed with growing your business.
When someone books onto a service (e.g. your Tuesday morning online Hatha yoga class), BookOm automatically sends them the details of the class, sends a reminder, and deposits the money directly into your Stripe account. You’ll wonder how you ever lived without BookOm by your side.