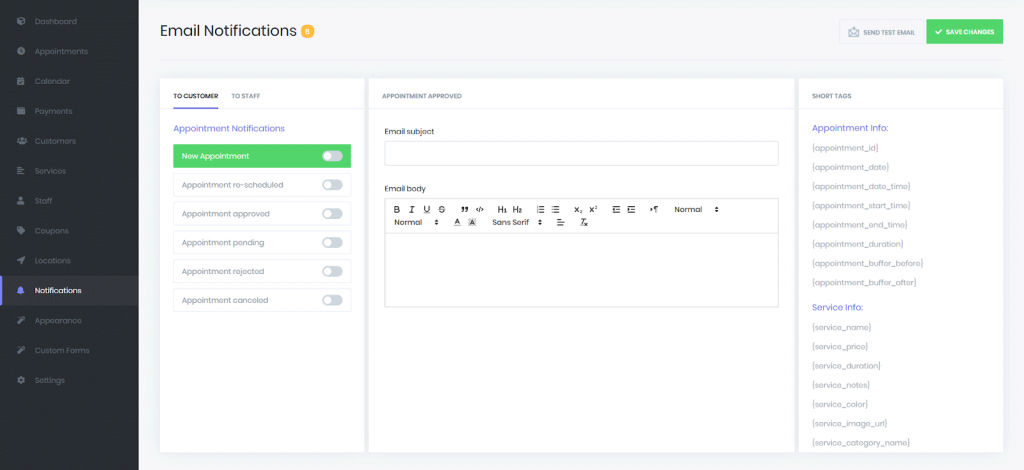
Email Notifications
Step 1: Click Notifications

Click “Notifications” on the left side of the BookOm dashboard.
Email Notifications
Step 2: Select Email Notifications, Write Emails Using Short Tags And Activate Them

9 Notification Options
On the left side, you’ll be able to choose from these nine appointment notifications:
1. New Appointment
An email will be sent to the customer when they make a new appointment. There are 17 “appointment info” short tags that you can copy and paste into the email (see example email notification below)
Hi {customer_first_name}, your have been enrolled in the {service_name} which is on {appointment_date_time}.
2. Appointment rescheduled
If you change the appointment within the “appointments” section (e.g. if the customer calls you to reschedule the day/time), the message will be automatically sent to the customer (see example email notification below).
Hi {customer_first_name}, your new appointment date and time for {service_name} is on {appointment_date_time}.
3. Appointment approved
An email will be sent to the customer approving (confirming) the appointment.
4. Appointment pending
An email will be sent to the customer letting them know that the appointment is pending.
5. Appointment rejected
An email will be sent to the customer letting them know that the appointment has been rejected.
6. Appointment canceled
An email will be sent to the customer letting them know that the appointment has been canceled.
7. Reminder before appointment
An email will be sent to the customer reminding them of the appointment.
8. Reminder after appointment
An email will be sent to the customer after the appointment (e.g. thanking them for the
appointment).
9. Access to Customer Panel
An email will be sent to the customer with a link to their customer panel if you add the short tag {customer_panel_password} to the email.
Short Tags
Appointment Info Short Tags
Customer Info Tags
Staff Info Short Tags
Location Info Short Tags
Company Info Short Tags
Zoom Info Short Tags
Customer & Staff Options

On the top left you’ll see “To Customer” and “To Staff” menu. Click on “To Customer” to open all nine of the appointment notification options for customers. Click on “To Staff” to open all nine of the appointment notification options for your staff.
Activating An Appointment Notification

To activate an email notification, toggle the switch to the right (turns the toggle purple). If you later decide you no longer want that email notification, move the toggle to the left (return the toggle to grey).
Note: If you deactivate the notification, all the text within the email will be deleted, so if you want to save that text for the future, copy and paste it somewhere safe.
Send Test Email

If you would like to test the subject and body of the email notification, you can send a test email by clicking the “Send Test Email” button on the top right.
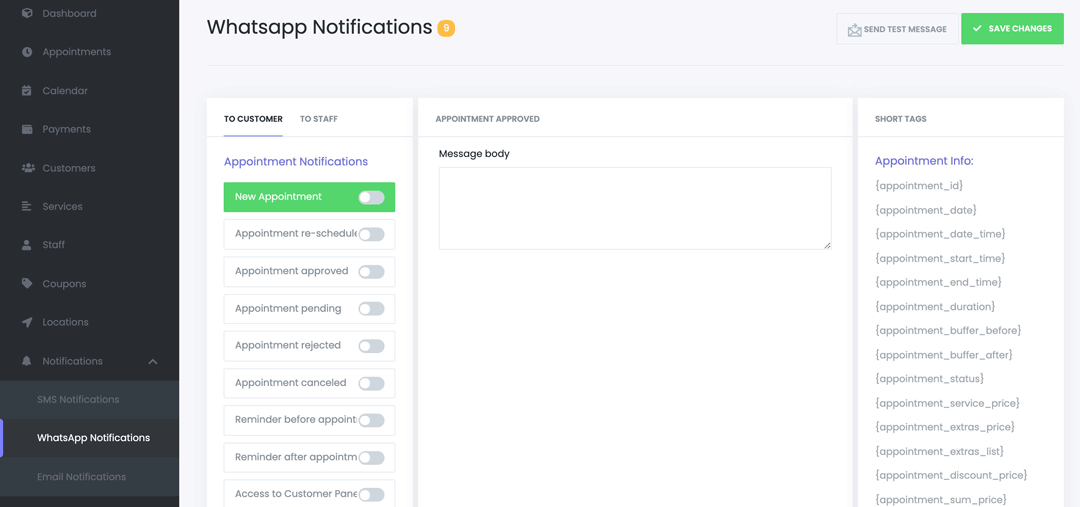
SMS & WhatsApp Notifications: How to send automated SMS & WhatsApp notifications to customers and staff Within BookOm
Within the “Notifications” section of BookOm, you will also able to send SMS and WhatsApp notifications to your customers and staff (see screenshots below).