In this post, you’ll learn how to add Google Maps to your services within BookOm’s dashboard.
You've Just Got Your BookOm. Congrats! You Should Be Excited Because By The Time You Get To The End Of This Post You'll Have Added Google Maps For All Your Services, And Be One Step Closer To Taking Bookings On Your Website.

The 2 Steps To Add A Google Maps To One Of Your Services Within BookOm
With “BookOm Teacher” and “BookOm Studio”, you can add Google Maps to all your services. This makes it easy for your prospects to see the exact location.
Below are the steps to add a Goole Map to one of your services within the BookOm dashboard.
Step 1: Click Add Location
Click “Locations” on the left side of the BookOm dashboard, then click the “Add Location” button to add a new location.
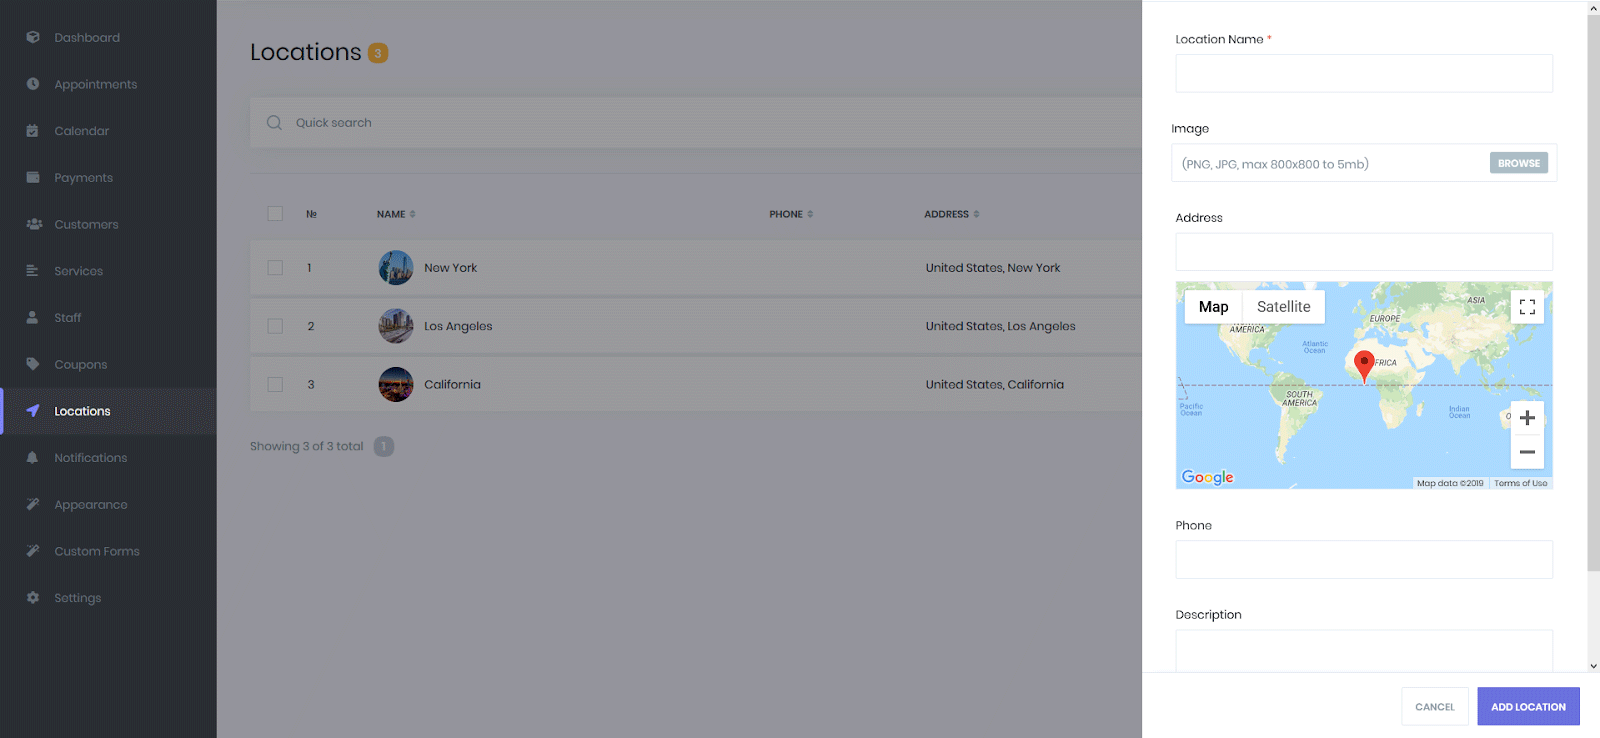
Step 2: Add Location Details
In the opening window, you can enter the name of the location, add an image of your location, and provide the address (and choose it from the map). You can also enter a phone number for the location, and a short description of the location (e.g. wheelchair accessible, etc).
Let out a little whoop of joy, because you’re a step closer to putting the booking form on your website (or share the booking form link in emails, Facebook, etc).
You can think of BookOm as a full-time member of your staff who has taken over most of your admin work. The moment you add the booking form to your website, BookOm goes to work 24/7 booking people onto your services.
But It doesn’t stop there!
BookOm is obsessed with growing your business.
When someone books onto a service (e.g. your Tuesday morning online Hatha yoga class), BookOm automatically sends them the details of the class, sends a reminder, and deposits the money directly into your Stripe account. You’ll wonder how you ever lived without BookOm by your side.